Oct 15 2008
Perfect Presentation – Part II
Today I’m focusing on gift presentation in bags with a Halloween theme. I love using bags, whether it means making them from scratch or decorating a purchased bag — just plain old fun!!! If you missed Perfect Presentation Part I onmaking boxes,be sure to check it out. Here’s my trio for today, with tutorials to follow:

On the left isan alteredhandled bag I purchased at Wal-mart. I call this my adult Halloween bag because it just looks *so adult* to me — LOL!!! In the center is a bag I made from scratch, and on the right is a candy treat bag made using a clear envelope. All designer paper used is in a Halloween pad by Jen Yanok for K and Company from Michaels, all ribbon is from Wal-Mart, and all stamped images are by JustRite.
I’ll start with the BOO bag, or some may call it a box. It is your basic 2,5,7,10 box with a flap on top and kind of squeezed together on top to form a bag shape. Here’s a close-up:
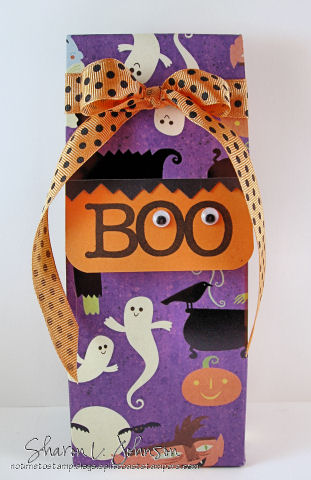
The orange BOO piece was added to trim up the flap. There is velcro under the BOO to hold to closed. The ribbon is wrapped around the flap, secured with tape on the inside and tied on the outside. These are really quick, easy and fun to make. Here’s a shot of the process:
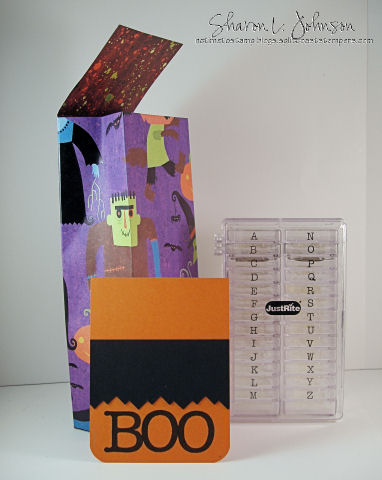
See how plain that flap looks with nothing extra? Just HAD to trim it up. This is the BOO piece I made and then just secured it on the underside of the flap. It also serves to make the flap piece much stronger. Can you also see howthe bagis squeezed on top to take on a bag shape? I made that jagged edge with a retired SU punch calledSquare Steps Corner Pocketand this piece is the negative piece left after punching. It is a corner punch with the guard removed. Corner rounder used on corners. And check out my wonderful clear stamp alphabet set by JustRite — LOVE these things!!! I LOVE how crisp and dark they stamp, that they are clear for easy positioning and that they snap together and store so compactly in their own plastic box — it doesn’t get any better!!! This set is called Clear Uppercase Typewriter Lettersand in checking for the link I notice they are on a 50% off sale along with many other sets of pre-inked alphabets — a good time to pick some up! And here’s the template for this bag:
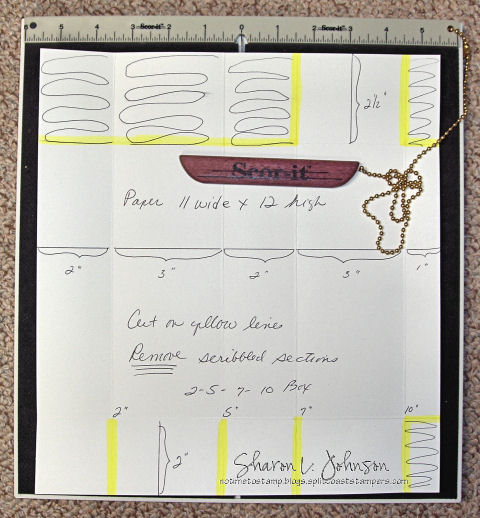
Another quick and easy project using my full-sized Scor-It. Cut your paper to 11″ wide and 12″ high. With the 11″ side butted up against the measuring rail so you are scoring along the 12″ length of the paper, score at 2″, moveyour paperover so the score you just did is at 3″, move again so the last score is at 2″, then move again so the last score is at 3″. You are scoring at 2″, 5″, 7″ and 10″. This gives you the 4 sides of your bag plus a 1″ tab to adhere it together. Now rotate your paper so the 12″ side is against the rail. Score 2″ from the bottom. Turn it the other way, score 2.5″ from the top. Done scoring. Now, CUT on the lines highlighted in yellow. You will actually be CUTTING OUT andDISCARDING all the areas that are done in scribbles. Once cutting you can easily see your box, the tab, the bottom and the top flap. Adhere together and decorate away!
Next, I’ll show you the candy treat bag, a quick project for the younger set:
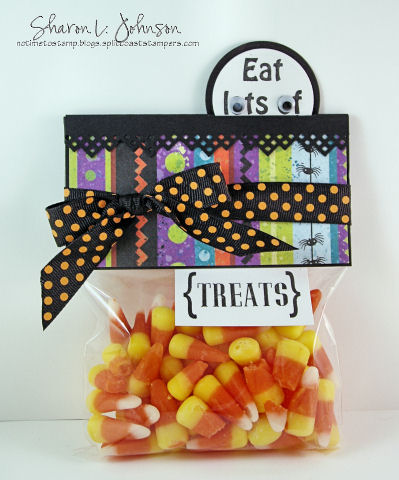
For this I used a cello envelope. The top is made tent style, decorated and stapled onto the bag. The ribbon hides the staples. And that negative jagged edge on the project above — well, this is the positive cut fromthe Square Steps Corner Pocket punchforming my top border. Here’s a shot of the process:
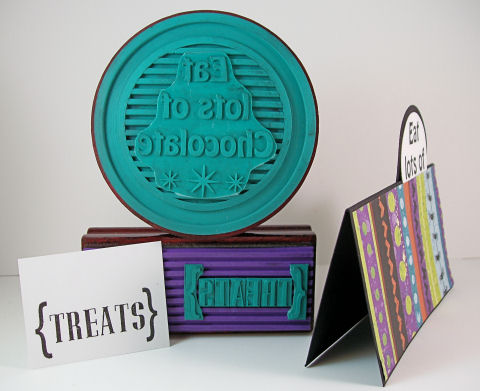
See how the bag topper is just a tent fold, easily accomplished on my Scor-It. The *Eat Lots Of* was stamped using a stamp in the Christmas Ensemble and the Harmony Circle Stamper III, hiding the *Chocolate* underneath the DP. It is cut and embossed using my Circle Nestabilities by Spellbinders. The {Treats} was stamped using the smaller of the Rectangle Stampers and the 50 pt. Brayton Font. The { } were from the 95 pt. Brayton Font. (3 sizes of font come in each set.) And see how I notched out the centers of my { } so I could get my letters in closer — again, it’s OK to cut your rubber!!! And I obviously did a lot of cutting on my larger stamp as well. Attach the {Treats} to the backside of the topper front, staple the topper onto the bag, wrap with ribbon and DONE!!!
And last, but not least, is a super simple project. Here I just decorated a white handled bag I purchased at Wal-Mart. Using fun paper and pretty ribbon makes all the difference in the world.
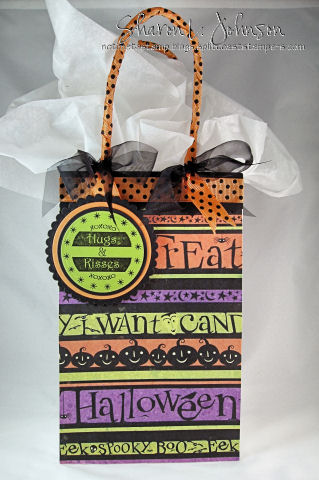
Gosh, I love this bag!!! I’d like to carry it for my purse — LOL!!! The Hugs and Kisses sentiment was stamped onto a scrap of green Prism paper with Versa Fine Onyx Black, cut and embossed with my Petite Circle Nestabilities from Spellbinders and adhered to the bag with Pop Dots — it sure completed the bag. Hugs and Kisses is found in theHarmony Classic Circle StamperII Ensemble,which includesthe Harmony Circle Stamper II. I did need to condition this stamp. You can find my tutorial on conditioning large solid image stamps here. I think the thing I love most about this bag is that I wrapped the handles. Check them out:
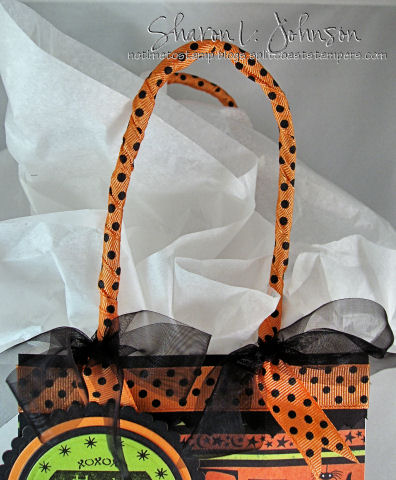
Isn’t that fun!!! I just took a piece of wider red sticky strip and ran a length of it from the base of the handle on one side, up and around the handle, down the other side. Then I just squeezed it around the handle with my fingers, and when it was around and down tight I pulled off the red covering and wrapped my ribbon around, leaving myself tails. Not knowing what to do with those tails as this ribbon is rather stiff and not as supple as I usually prefer, I just let them hang and trimmed the bottom edge. To secure them, I took some black sheer ribbon and tied on my bows. That held my loose dotted ribbon tails in place perfectly.
To read more about the Scor-It or find a retailer near you, check out the Scor-It site. They do not sell the Scor-It boards from their site, but I know Ellen Hutson carries them (they are under TOOLS) and in doing a Google search I also came up with another source Marcos Paper. They also appear on a ton more Google searches.
Check out the JustRite Blog — they have another contest running with great prizes, a chance to be featured, and information on sale items in their store. You may have to scroll down a bit to find the rules — but be sure to check out all the great entries — FUN STUFF!!!
Also, I have some retired SU sets for sale. If you are interested, click on the FOR SALE TAB above the Blog Banner way up on top, or click here. Thanks!
It think that does it for today. Part III is coming!!! Can you tell, I LOVE wrapping gifts and presenting packages!!! Wishing you all a wonderful week and again, thanking you profusely for stopping in!!! I truly appreciate knowing you were here!!! Thanks so much!!!
22 responses so far


These bags are WONDERFUL! Love these and will probably be copying your ideas for a goodie bag for our Grandson. Thanks for sharing!
Thank you for taking the time to do these Perfect Presentations!! They are really beautiful projects and certainly add to the gift giving experience! 🙂 Really enjoy your blog and find it most inspiring.
Debbie
Thanks so much for sharing the templates for your boxes and bags. These are fabulous. How I’d love to get a little gift all wrapped up by you!
Perfect is right! I LOVE part 1 and part 2! Both of your projects are AMAZING! TFS! …and thank you for the fab directions! Hope you are doing well! 🙂
Another winner!! These are all so adorable! I’m very fond of the *BOO* box/bag. Beautiful or fun wrapping sure does whet the appetite 🙂 Thank you for sharing them.
This is perfect presentation for SURE! These are all just darling, Sharon! So fun and perfectly decorated. I wouldn’t care what was inside–I’d be so excited about the package! Great job and fabulous ideas!
THANK YOU so much for sharing your creations! These are wonderful and will make the gift giving season so much more fun. It never fails, I have a gift and I don’t have a bag/box to put it in. No excuses now – I can make one!!
i love halloween they are just so cute
Wow– super cool Halloween bags! LOVe the BOO box!
Oh these are so awesome Sharon! Your ideas never cease to amaze me! I love the first ones too, that ribbon was awesome..so is this! LOVE it!
How cute!! I say the wrapped handles are my favorite also, but a close second are the wiggle eyes you added for o’s!! Just darling.
TFS your awesome ideas.
Oh my gosh, how cute is this! Love it Sharon, so adorable and perfect for the little trick-or-treaters. I still have to get mine made up! Where does the time go?
Sharon, your bags and boxes are just adorable. Your creativity must amazes me. How cool is that handle and that sheer ribbon to fasten adds so much. Great job on all of them.
Joan
O-H M-Y G-O-S-H! Now I want to make some Halloween bags!!! lol These are FABULOUS, Sharon!
Another fabulous tutorial. You are such a class act, and I appreciate you so much! Best, Curt
Sharon—-No doubt about it, I want to trick-or-treat at your house this year!!! (So what if I’m 40-something?!?!) You wouldn’t even have to give me candy—I just want one of those bags! Fabulous creations—-love them all!!! Love stopping by your blog, you’ve always got something stunning to share with us. Have a wonderful day—-hugs to you! Pam (4Hounds)
These projects are so wonderful I love them all they are fun and colorful and I love all the extra details. TFS.
Debbie/Phx AZ
OK, don’t take this the wrong way but you make me sick!!! Just sick, I tell ya! I wanna’ be Sharon when I grow up!
WOWZER!! What amazing projects these are!! Thanks so much for sharing!! 😉
What a fabulous ensemble!! Everything looks so spooky cute, and I love it all!!
Another totally amazing ensemble–Sharon, you ROCK!
Awesome! I love your tricks with ribbon. What a treat! ;O)