Apr 14 2009
A JustRite Seed Bag for Mother’s Day
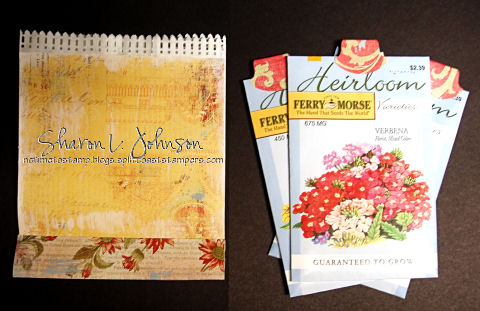
This is one of those projects that turned direction once I started, due to a shortage of time, but I do like the end result. I was planning to do a standard paper bag pocket album type of thing to insert seed packets in as a Mother’s Day Gift, decorating all the pages. Well, as so often happens, the day got away on me, time was short, and I had to make some cuts — and the result is this sort of honeycomb design pocket bag for my seed packets. I do love this design and after the photos I’ll show you how I did it. Here’s the finished product:
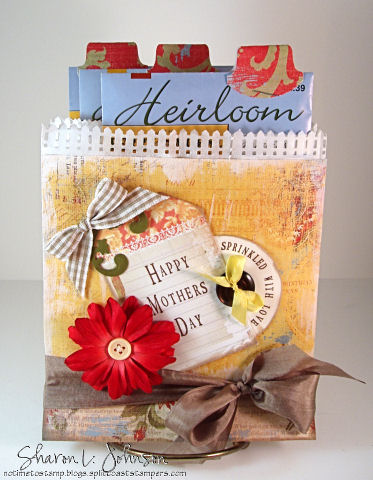
Kind of shabby, which I thought would go well with the Heirloom seed packets. This is made like a bound book. The binding is on the bottom, partially covered with my wide silk ribbon. There are 3 pockets for my seeds. But the way it opens, thereare actually more like 6 compartments, 2 in each pocket. Here’s how I started:
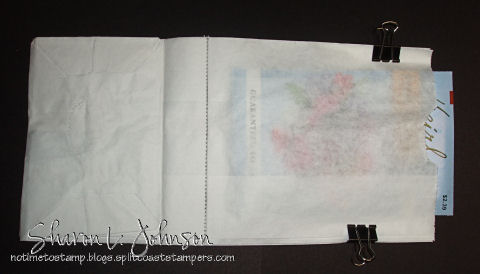
These are 3 standard white lunch sacks from the grocery store, layered on top of each other. I inserted 1 seed pack as my guide as to how big the pockets need to be. I then clipped the sides so they’d stay in place. I then went to the sewing machine and sewed across the bottom. I had first measured and drew a line to follow with a pencil.
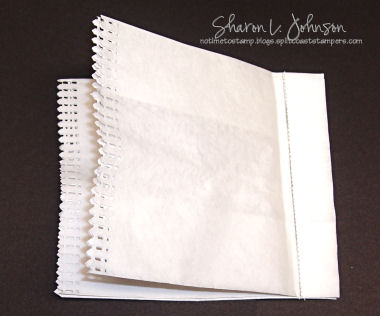
I then took my sewn together bags to the paper cutter and cut off the bottoms, 1″ below my stitching line. Since this was a garden theme, I thoughtthe picket fence might work (this was definitely a plan as you go project), so I straightened my top edge at the paper cutter and cut each bag with the Martha Stewart picket fence punch. The full thickness of the bag top (all layers) cut easily with the punch. I punched the tops of all 3 bags.
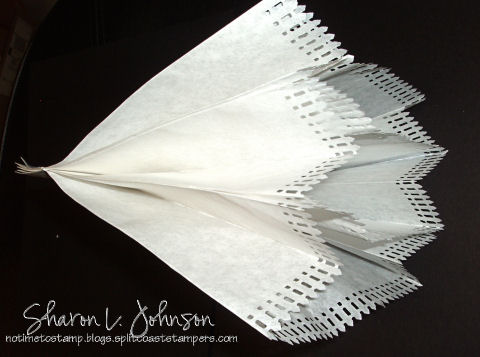
Using my Glue Glider, I then taped the bags together. Actually, the center bag got taped to the one in front and one in back, so the bags no longer would separate from each other, and you end up with this kind of honeycomb arrangement. There are now 3 pockets, but because of the folds in the bags, you kind of have 2 compartments in each pocket. Now that the basic pocket bag is made, it’s just a matter of decorating it up — the fun part!
I apologize for this poor photo — it’s been one of those kind of nights — LOL!!! As you can see, I covered my bag with DP by Daisy’D’s. I wanted a bit more white in my DP, so I applied very hurriedly some Gesso with a foam brush — not a great job – but this was Shabby, so I was good to go, and it gave me the bit of white I was after. I used the SU tab punch to top off my seed packs and make them easy to pull out of their pockets.
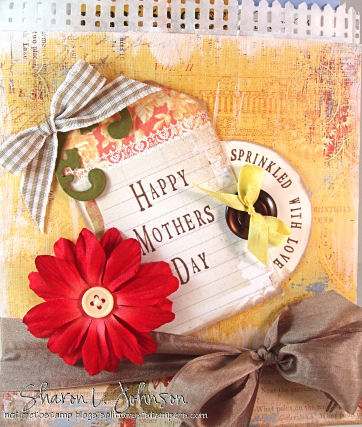
Here’s a closeup of the detail to the focal image. The tag was a punch out in the paper pad. I used JustRite Times New Roman Uppercase Font (50 pt and 25 pt) on the larger of the Vertical Wood Stampers to create my sentiment. The sentiment in thehalf circle is from JustRite’s Celebrations Demi Phrases, used on a Wood 2″ Stamper. The lower ribbon is 1.25″ wide silk, and the narrow yellow silk was fine enough to thread into the eye of a needle and I used it to sew the button onto the panel. The die cut is from the new Floral Accent dies by Spellbinders and the gingham is 3/8″ by May Arts.
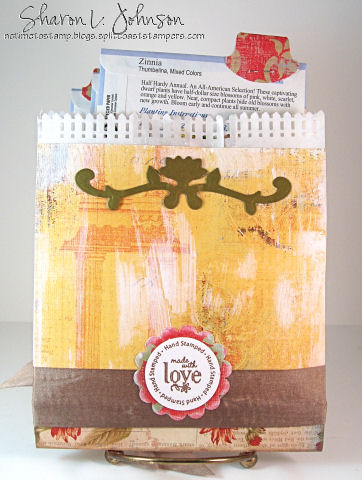
And here’s the back. I wanted to show you the CUTE little *made with love* for the back of projects — I was so excited when I saw this! Actually, there are 2 for the backs of projects in a set called Tiny Words by JustRite, available on 5/10, but available for pre-order now. It fits on the new tiny 1 3/16″ Wood Stamper. This will surely be a fun little set to work with. It’s shown in the picture below.

Here’s what I used to make this project. Everything shown is currently available, with the exception of the Tiny Words Set, which is available now for pre-order with a 5/10 shipment date. Fun new things!!! You’ll love them!!!
Stamps: Times New Roman Uppercase Font, used on a Vertical Stamper, Celebrations Demi Phrases, used on a Wood 2″ Stamper, Tiny Words Set, used on a Wood 1 3/16″ Stamper, all by JustRite
Paper: PTI White and Vintage Cream; Prism Dark Green; Beacon Hill 8 x8 pad by DaisyD’s.
Ink: Versa Fine Vintage Sepia, Color Box Chalk Creamy Brown.
Accessories: May Arts Silk and Gingham Ribbons available at the Stamp Simply Ribbon Store, Vintage buttons, Sewing Machine, Needle, Thread, Primas, Lunch Sacks, Petite Circle Nestabilities and Floral Accent Dies by Spellbinders, SU 1 3/8″ Punch, SU Scallop Punch, SU Tab Punch, Martha Stewart Picket Fence Punch, Gesso, Paint Brush, Glue Glider, Glue Dots
Shopping:
Stamp Simply Ribbon Store has all the May Arts Ribbons used and more.
Joan’s Garden has the products used by Spellbinders, Martha Stewart and Glue Glider.
Thank you so much for stopping in today. It’s been a crazy day around here and I’m wishing for a quieter tomorrow!!! Hope you are all having a good week. Again, thanks much for stopping in and we’ll see you soon!!!
21 responses so far


this is a great project! I love love love it.
Oh my goodness! This is too darling for words! Brilliant! Thanks so much for sharing your creativity! I will certainly try to make one of these 😉
Absolutely beautiful!
Great project…as usual. Thanks for the photo step-by-step. That takes time and this visual learner appreciates it!
It turned out lovely and am sure your mom will love it…
Jen
This is such a neat idea! I love the picket fence punch and thanks for such great detailed directions!!
I love this Sharon, what a wonderful gift for Mother’s Day! Love how you used the MS punch for the picket fence border, how adorable is that!
What a clever idea using the lunch sacks! Very pretty-love the picket fence top! tfs
Wow! This idea is fantastic! Who will think that there is another fabuolous use of those bags! Thank you for sharing, Sharon!
OMG…I am just loving this! I have been “on the fence” about whether to purchase the picket fence punch…now I think the answer is obvious! Thanks for sharing your talent with all of us!
Just found your blog site and added it to my favs :0) Your creations are so pretty! I’ve never seen or heard of Just Rite before, but now I think I might have to try it out! What would be your suggestion as a starter set? I’m an experienced stamper, just new to Just Rite.
Thanks!
Gorgeous and what a fantastic idea!
What a cute idea Sharon! I love the little picket fence topping and the shabby chic appearance. TFS! Sheila
Sharon–I just LOVE this!!!
What a cool packaging!! I am fascinated with how you used that punch!!!
I really want to try this!!
Fabulous idea! I love it!
Oh how stinkin wonderful this turned out. I’m lovin’ it!!!!!!!!!!!!!
I am sitting here saying, awe, awe, awe. Delightful, that is the word to describe this project.
Colleen
You are a genius, this project is out of this world fantastic!!! I LOVE it. TFS.
It’s every bit as wonderful like this as what you originally had in mind, I’m certain! I love it! The shabby look is so perfect for a garden-type project. What a delightful gift for any Springtime occasion!
I love, Love, LOVE this project. The step-by-step pictures are a great help. Thank you for taking the time to share your work.
[…] lunch size paper bags to make this seed bag for Mother’s Day. It holds several seed […]