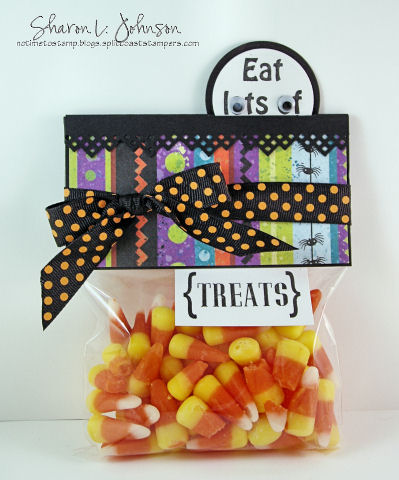
Presentation is everything! This begins a multi-part series on quick and simple ways to present your gift items — tricks, treats, teacher gifts, hostess gifts, little gifts– this week I’ll beshowing you different ways to contain and present gift itemsin lovely fashion during the autumn season. Today I’ll beginby makingsome giftboxes which is a sure-fired way to give an inexpensive little gift some instant appeal. Here’s the 3 we’ll be doing today. Tutorials for all 3 will follow:
I LOVE making boxes — my absolute MOST favorite of all 3-D projects. They are quick, easy, functional and usually create a big WOW!!! And WOW is good — especially when you are presenting a little gift that is perhaps NOT so WOW on it’s own — LOL!!!
I have used Crate paper, Crush Collection, for all three of these boxes. The tags were either punch-outs that came with the paper, or something I made using the same paper. I LOVE Crate paper for boxes. It is nice and heavy, it has a great texture, and it even has it’s own smell — have you ever noticed that? Really, it does!!! I’ve had this paper for quite some time and over the years I’ve purchased Crate productsfrom both Jacksonbelle Embellishments and Eclectic Paperie. This is THE perfect box paper!!!
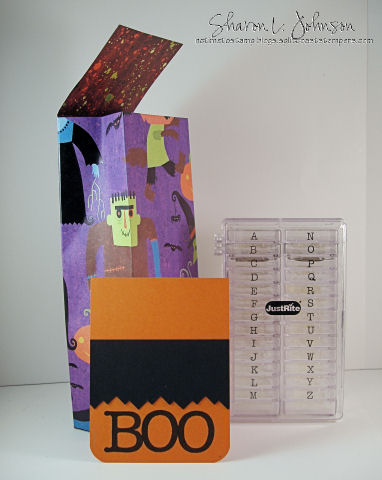
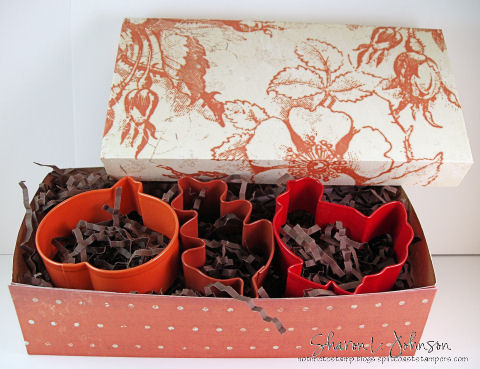
I’ll start with the uprightnarrow box on the left. It measures 4 x 8 and it houses a simple set of Autumn themed metal cookie cutters made by Wilton from Wal-Mart. They were $2.47 and came tied on a cardbooard backing with metal twist ties — MOST unattractive. I love metal cookie cutters and thought they would be nice for a little teacher treat or girlfriend gift — anytime! Take a look:
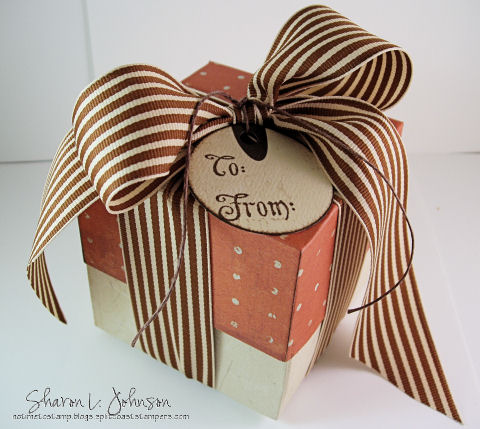
A pumpkin, leaf and a turkey — fun — resting on some shredded paper also purchased from Wal-Mart. It makes a great filler!!! The box top slips over, it gets tied with a pretty ribbon, a tag hung on, and ready to go!!! Here it is all wrapped up:
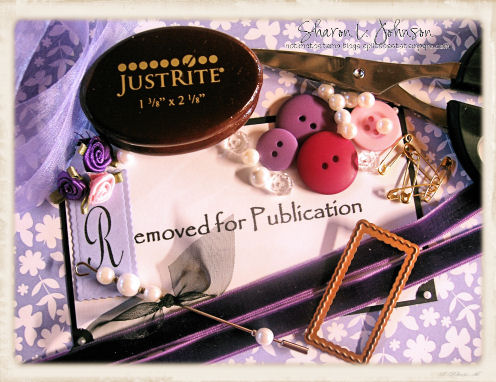
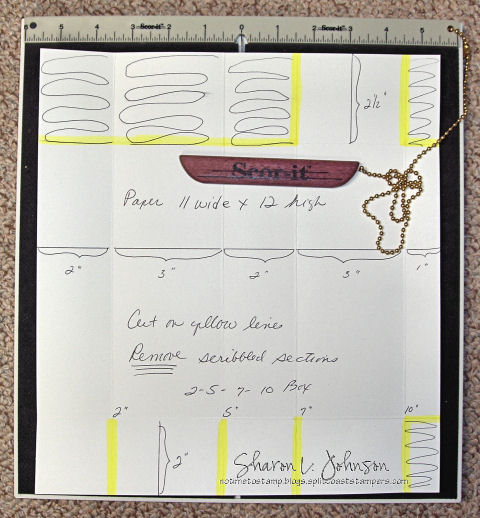
This tag was a punch out that came with the paper and I used my Harmony Rectangle Stamper by JustRite with the Brayton alphas tostamp my To and From. The edges were DTP’d with the ink as well (Palette Burnt Umber). My ribbon is 1.5″ wide striped grosgrain by May Arts. The trick in doing this box is to make sure the top is a tad larger than the bottom — then it slides on and off so nicely. Here are my hand-written templates — nothing fancy — but I hope it’ll get the information across to you.
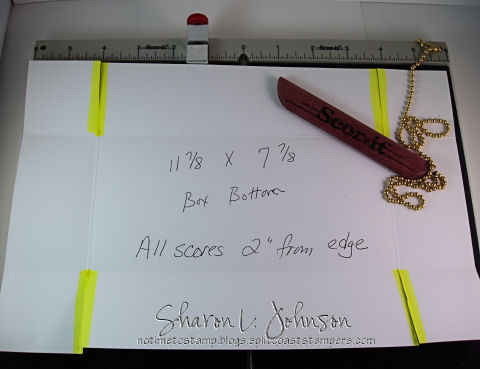
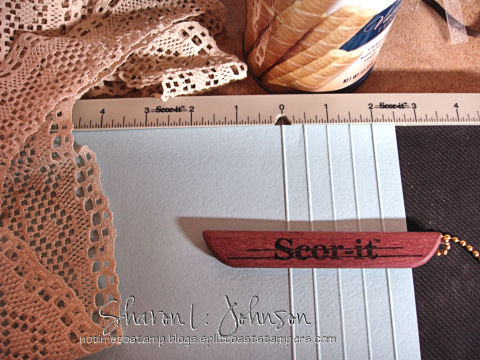
I used my full sized Scor-It to quickly and easy make these boxes. To make the box bottom, cut the paper 11 7/8 x7 7/8, then simply score 2″ from all 4 outer edges. Fold on the score lines, and then cut on the lines highlighted in yellow, and assemble the box using a strong double sided tape.
About scoring on the Scor-It: The Scor-It makes a hinged score which isa very functional score that works extremely well, but you should be sure to fold the paper in the right way so your hinged score works properly. When you score, one side is indented and one side is humped out (highly professional terms — LOL!). The INDENTED side is the OUTSIDE of the fold. An easy way to remember without having to think each time, when you lay your paper on the cutter, put it upside down — so the side you want for the FRONT, is laying down against the rubbery pad — then it’ll come right. You will actually be running your scoring tool along the WRONG side. Easy —
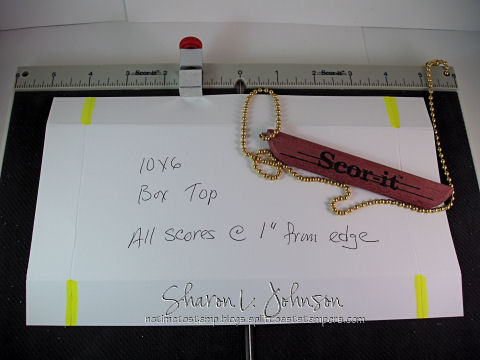
And here’s the box top. Cut your paper 10 x 6, and then simply score 1″ from each outside edge, fold, cut on yellow lines, tape, and done!!! See how we made the box bottom a bit smaller — now this top will slide on and off very easily!!! When you try it, you’ll see!!!
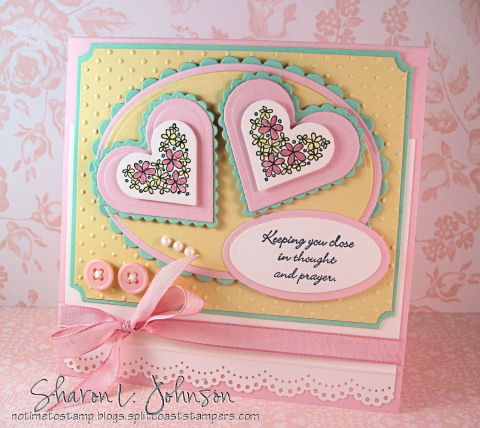
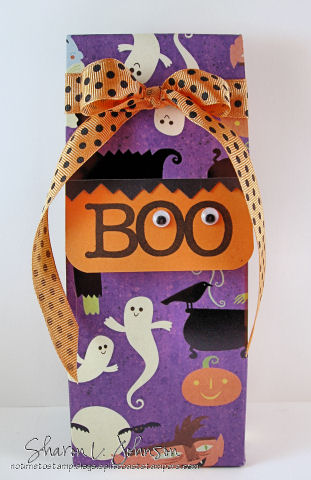
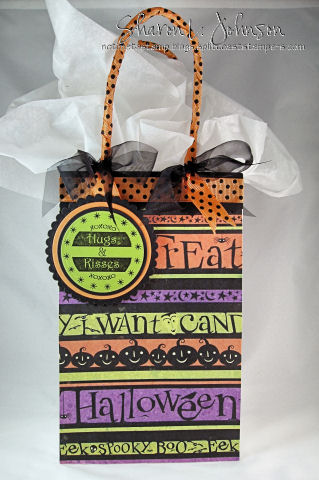
My second box holds a $1 Wal-Mart jar candle. I tied a ribbon on the jar (it is Crate ribbon to coordinate with the paper). And even though this candle was very inexpensive, it smells just luscious!!! Mulled Cider — how perfect for a crisp fall evening!!! I lined the box with more of the shredded paper and it perfectly protects and nestles the candle. Here it is all wrapped up.
This tag was another punch out in the Crush pack of paper. I used a very old PSX stamp for the To and From. The brown hemp I am using to tie on my tags is from the jewelry making section of Wal-Mart. I am particularly fond of this 3.5″ square box. Here’s the templates for it:
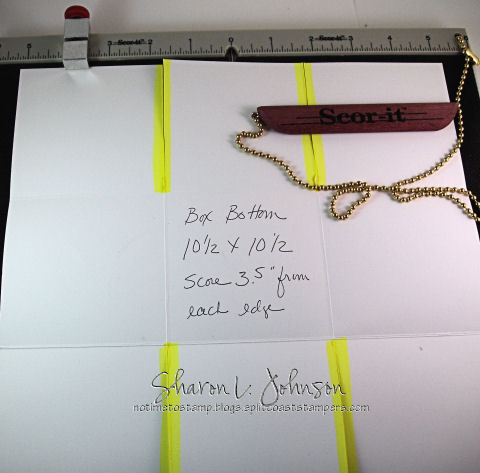
For this square box bottom, cut your paper 10.5 x 10.5 and score 3.5 from each outside edge. Fold, cut on yellow lines, tape and assemble. You can see I have my paper guide set at 3 1/2 inches. When I’m just scoring cards on my Scor-It, personally, I don’t use the guide. I find it very easy to just lay my paper on the correct measurement. But when I’m making a box, it is really important to get all your measurements accurate to make the box fit correctly, so I do use my paper guide for boxes. It easily adjusts to any measurement you need. Here’s the box top:
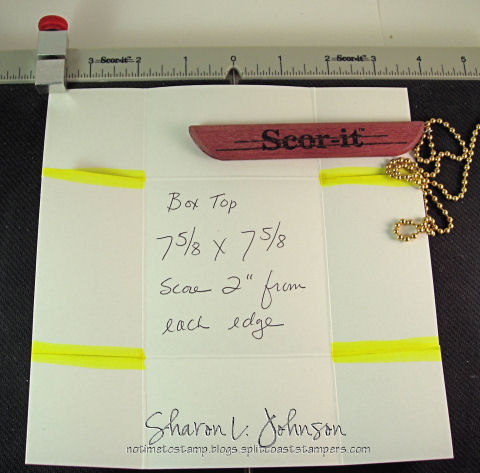
Again, I wanted this slip on box top to be a bit larger than the bottom, so I added that 1/8th of an inch — it makes all the difference. Cut your paper 7 5/8″ square, and score 2″ from all four edges. Again fold, cut on yellow, tape, assemble.
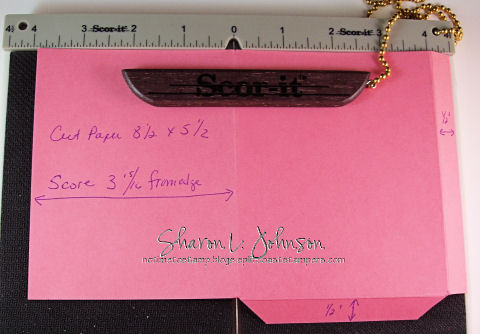
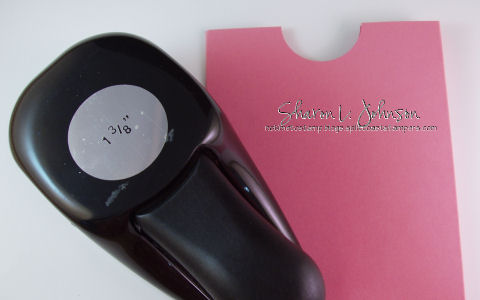
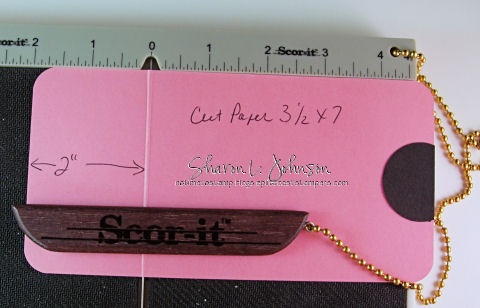
And here’s my last little gift item. This box measures 4 x 6 and is only 1″ tall. It holds ribbon — what a great gift for a stamping friend!!! The box topis made of acetate or clear cardstock, allowing us to see the gift inside — how cool!!! This time I made the box top smaller rather than larger than the base. Can you see how this box top goes INSIDE the box. Making it that 1/8 inch smaller does the trick. This functions very nicely as well as shows off the gift inside!!! I made this tag using the same PSX stamp and a die cut tag from Tags Five by Spellbinders. Here’s the templates:
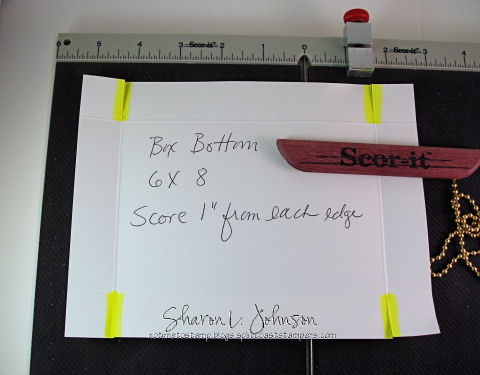
Cut box bottom 6 x 8 and score 1″ from each of the 4 edges. Finish off as the above boxes.

And here’s the template for the acetate box top. It’ll be just a tad smaller than the box and it’ll slip inside the box as displayed above just perfectly!!! And don’t fret about having to score your acetate or clear cardstock. It’s no problem at all using the Scor-It — it’ll score just like butter. You will have to apply a bit more pressure than you normally use when scoring cardstock, but you’ll be able to tell/feel once you start — it’s no problem at all. Once scored, it is harder to fold the acetate than cardstock, but just use your fingers to press it down on all 4 sides, and once it takes its shape it’ll hold it well. These are SO FUN to make when you can see through and into the box!!!
If you’d like to read more about the Scor-It or find a retailer near you, you can do all that on the Scor-It site. They do not sell the Scor-It boards from their site, but I know Ellen Hutson carries them (they are under TOOLS, her service is phenomenal) and in doing a Google search I also came up with another store that I’ve been unfamiliar with — Marco’s Paper. And while I was cruising their site — guess what??? Michelle Zindorf is running some of her brayering classes there — how cool is that!!! OH, I only WISH I could go, and I even checked the map, but it’s way too far for this country girl!!!
Thanks so much for stopping in — always appreciate it!!! Part II continues tomorrow with more gift presentation ideas. Hope you try some boxes — they are SO fun!!! Talk to you later!!!


